These instructions will walk you through the process of upgrading your Trompe Loeil prefab’s *home control system from 0.75 to 1.01. The 1.00 updated scripts feature some under-the-hood memory and quality of life improvements, but the big end-user feature is the new automatic door feature that scans for approaching avatars and automatically opens when approved avatars are in range. This new feature works with the *home control Access List, or can be set to Public to open for anyone.
UPDATE (12 SEPTEMBER 2023): The consoleModule script has been updated to 1.01 to fix a capitalization bug when adding names to the Admin and Access lists. This bug can be avoided while using the 1.00 version by adding names in all lower case letters. Only the consoleModule script has been updated, all other 1.00 scripts remain the same and can continue to be used.
Once your prefab has been fully upgraded, you can try the new automatic door feature, along with the automatic closing time for clickable doors, by following the instructions for our *home control system.
NOTE: Upgrading will clear out and reset your Access and Admin lists!
Upgrade Kit Contents

The sales package includes the following 15 scripts:
– *home – consoleModule – 1.00
– *home – doorModuleRotate (-90) and (90) – 1.00
– *home – doorModuleSlide (various) – 1.00
As the upgrade only adds new features to the console and doors, all 0.75 window and light scripts can remain in the prefab, and will work with the upgraded 1.00 console and door scripts.
Quick Start Instructions – for experienced builders and modders
1. Rez a new copy of your Trompe Loeil prefab.
2. In the *home control module, delete the 0.75 consoleModule script and add the 1.00 consoleModule script.
3. In each door, delete only the 0.75 doorModule script and add a 1.00 doorModule script. Do NOT delete any other scripts or items inside the contents of the door besides the 0.74 door script.
Use the Rotate script for doors that rotate open and closed, and use the Slide script for doors that slide open and closed. We have included door scripts pre-programmed to open clockwise and counterclockwise, and to move along various axis directions and for varying distances. You may need to experiment to see which script will open each door in the best way for your prefab and preferences – simply delete the door script and try a new one. It should work immediately and you should not have to reset scripts.
4. Rename your Trompe Loeil prefab to indicate you have upgraded the *home control scripts.
5. Take the prefab into your inventory. You can now rez as many copies of the upgraded prefab that you need.
Step-by-Step Instructions – Updating The Control Module
1. Rez a copy of your Trompe Loeil prefab.
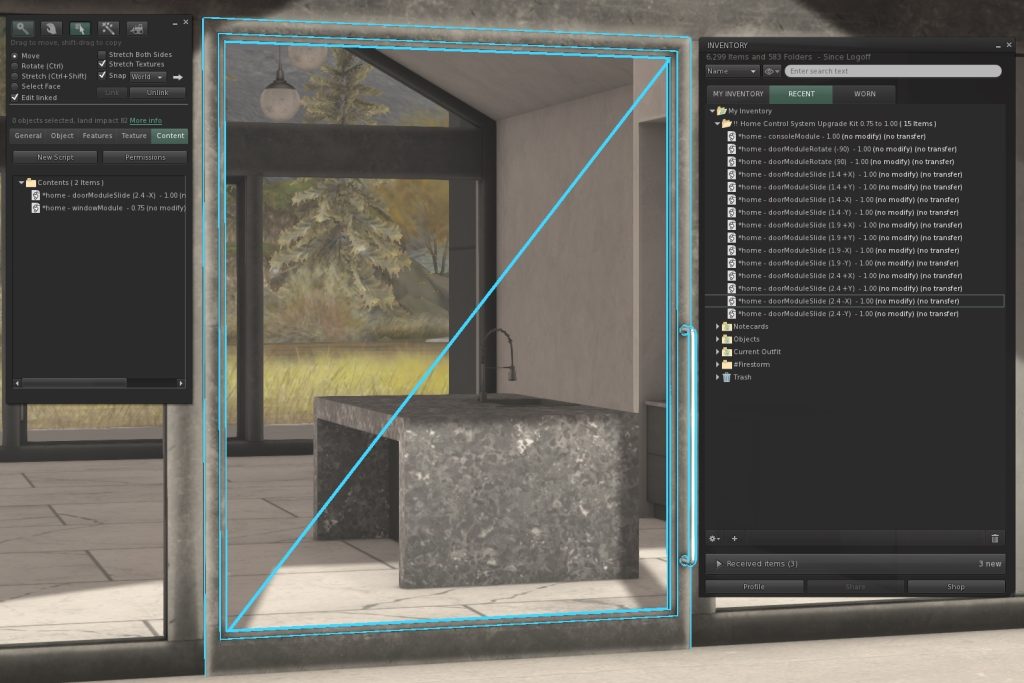
2. With Edit Linked checked, select only the *home control module.
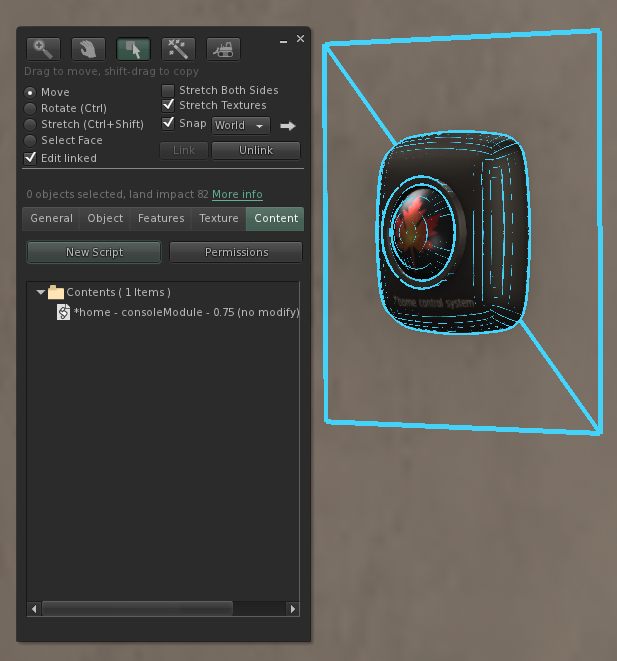
3. Right click the *home – consoleModule – 0.75 script in the Content tab of the Edit window and choose Delete. The Content tab should now be empty.

4. From your Inventory, drag and drop the *home – consoleModule – 1.01 script into the Content tab.
For each door, you will replace the door script. Depending on the build, design, location, and size of the door, you will need to pick from the provided pre-programmed scripts the best-fitting solution. Its easy to try different door scripts – just drop one into the contents of the door, try it out, let the door reset to its beginning position, and then delete the script before dropping a new one in.
Doors are either Rotating or Sliding. We will update a Rotating door first.
Step-by-Step Instructions – Updating A Rotating Door
1. With Edit Linked checked, select only the door you want to update.
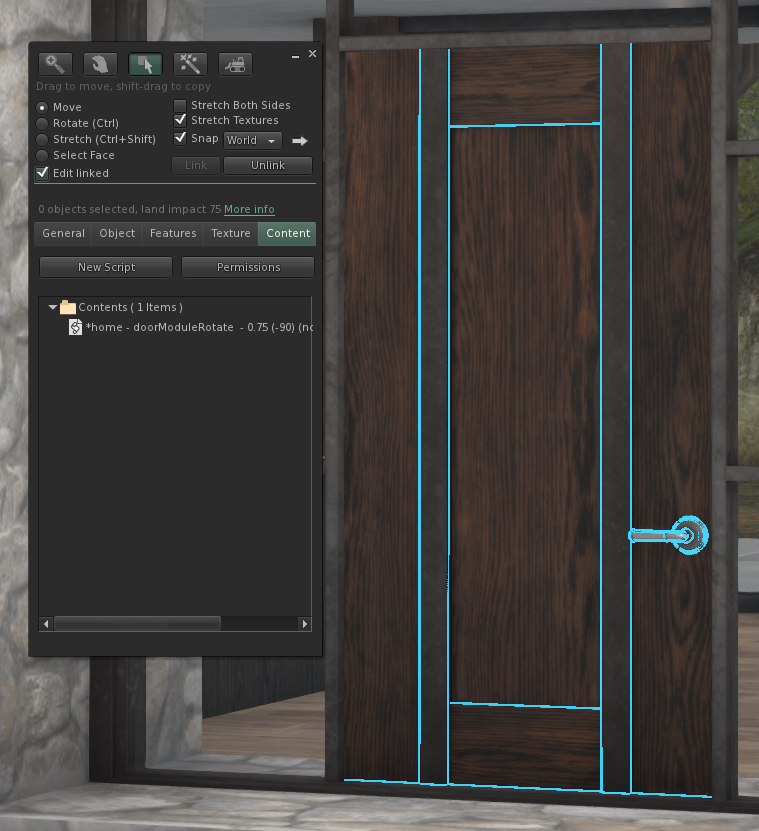
2. Right click the *home – doorModuleRotate – 0.75 script in the Content tab of the Edit window and choose Delete. The script may have a (90) or (-90) in the name; if it does, you can use this info in the next step. Do NOT delete any other scripts or items that may be inside the Content tab of the door.
3. Drag and drop the *home – doorModuleRotate – 1.00 script into the Content tab. Use the (90) or (-90) version depending on what the previous script was named, or use the other version if you want the door to open the opposite direction than as sold.
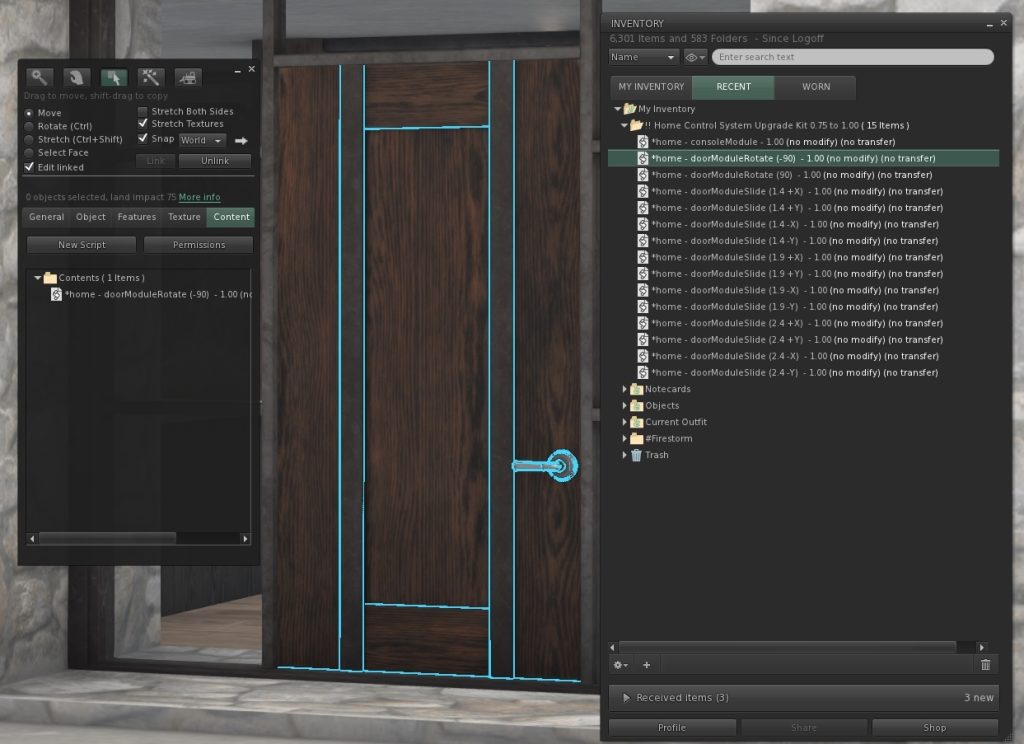
4. Repeat this process until each door is upgraded.
Step-by-Step Instructions – Updating a Sliding Door
1. With Edit Linked checked, select only the door you want to update.
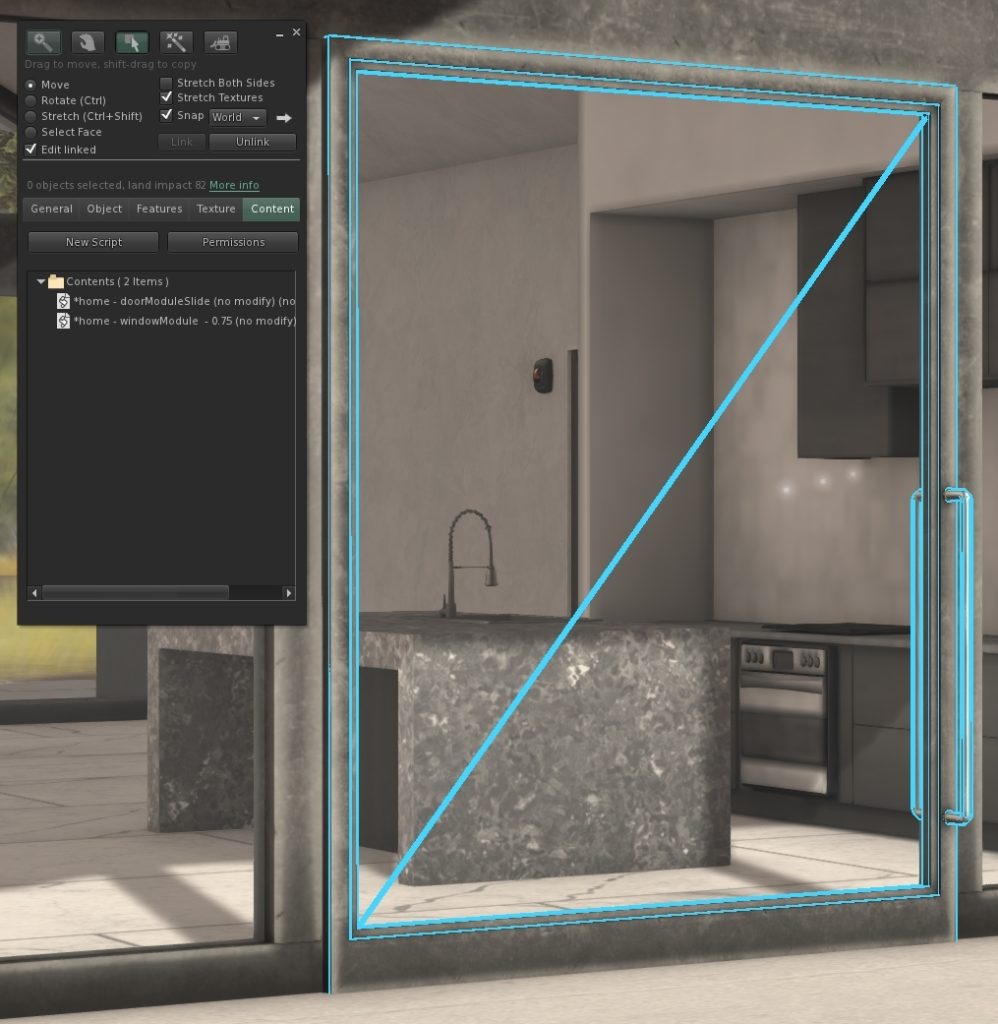
2. Right click the *home – doorModuleSlide – 0.75 script in the Content tab of the Edit window and choose Delete. Do NOT delete any other scripts or items that may be inside the Content tab of the door.
3. Go to the Object tab and look at the Size numbers. The X or the Y value, whichever is larger, will almost always be the width of the door – in this example, the X size of 2.886 is the width of the door. A sliding door should move a little less than its own full length, so for this door, we will use a script pre-programmed to best suit this width.

4. Drag and drop the appropriate *home – doorModuleSlide – 1.00 script into the Content tab. We have provided 12 to choose from.
The first number inside the parentheses is the distance in meters the script is pre-programmed to travel. We provide distances of 1.4, 1.9, and 2.4, to fit a variety of door sizes and positions. In our example case, the door is 2.886 meters wide, so we will use one of the four 2.4 scripts.
The X and Y, and their negatives, indicate what directional axis the door should travel on. This is a complicated determination, but in most cases, either the X or -X scripts will be the ones to try first. If the X script causes the door to move in the wrong direction, delete it out of the Content tab and replace it with the -X script and it will move in the opposite direction.
If the X scripts cause the door to move along the completely wrong axis – for example, the door now slides towards you instead of to the side – then use the Y or -Y scripts to correct the axis of movement.
5. Repeat for each door in the prefab.
Step-by-Step Instructions: Upgrading A Prefab Inside A Self-Installer (Advanced)
It is possible to update the scripts inside a prefab stored inside a self-installer, so that future deployments of the self-installer will rez the updated version. This is recommended for advanced builders/modders only, and because it utilizes a third party self-installer system, we cannot offer individualized support for this process.
1. Rez the self-installer and click it, and choose Rez from the menu. Do not finalize the placement or delete the self-installer box.
2. Update the *home control module and the doors as described above.
3. When you’ve finished updating the scripts, take a copy of the prefab only (no other parts, like pool water etc) into your inventory.
4. Click the self-installer box to bring up the menu, and choose DeRez.
5. Inside the contents of the self-installed box, delete the prefab only – do not delete anything else inside the contents except the prefab.
6. Drop the upgraded copy of the prefab you took into your inventory into the contents of the self-installer box.
7. Rename the self-installer box to indicate that it contains an upgraded prefab.
8. Take the self-installer box into your inventory. You can now rez it to install your upgraded prefab at any time.